
I appreciate the motto of Jon Compton at Canvas Temple Publishing: “Old Codgers Trying to Retire!” It’s something I can really relate to. I also relate to the game packaging philosophy behind Canvas Temple Publishing (CTP). CTP makes games for, how shall we say, more aged Grognards who don’t have the sharpest of eyesight or the most nimble of fingers. This means CTP games “go big” in terms of hex size and counters. The latest offering from CTP, The Boer War: Imperial Campaigns Vol. 1 (Joseph Miranda, Canvas Temple Publishing, 2023) shows the good—and challenges—of the CTP approach.
Bottom Line Up Front: I generally like The Boer War and the CTP “touch” to the game components, but the arrangement of the mapboard, and some rules issues bothered me at first.
The Canvas Temple Publishing version of The Boer War appears to be a reprint of a previous Joseph Miranda wargame, Boer War: The Struggle for South Africa: 1899-1902 published by Decision Games in Strategy & Tactics magazine issue #205 in Sept/Oct 2000. I do not own the original game so my comparisons are limited to what little is visible on BoardGameGeek. As far I can tell, The Boer War is an update of the older game with new graphics for the rule books, map, and counters. The games are not identical; whereas the original Boer War used a Political Points track The Boer War uses Campaign cards. It is likely that The Boer War incorporates much—if not all—the scenarios, Design Notes, Experimental Rules, and errata that were printed in Strategy & Tactics #214.
Big approach
The larger counters and hexes of The Boer War are very welcome to this Grognard. The 1″ counters with nice art fall out of the sprue smartly (almost too smartly) and are easy to read. The large 22″x34″ map is mounted and very thick. The two rule books (Imperial Campaigns Series Standard Rules and The Boer War Exclusive Rules of Play) are nicely laid out in a somewhat period-evocative appearance and make good use of formatting to distinguish between rules and comments or examples. Alas, for those who are looking for “progressive” wargame rule books that express themselves differently, the rule books for The Boer War are formatted using the SPI case notation. (To be clear, that makes no difference to me).

While all that sounds nice, some parts of The Boer War merit further discussion, and not all of it will be pleasant.
Groggy Goodness
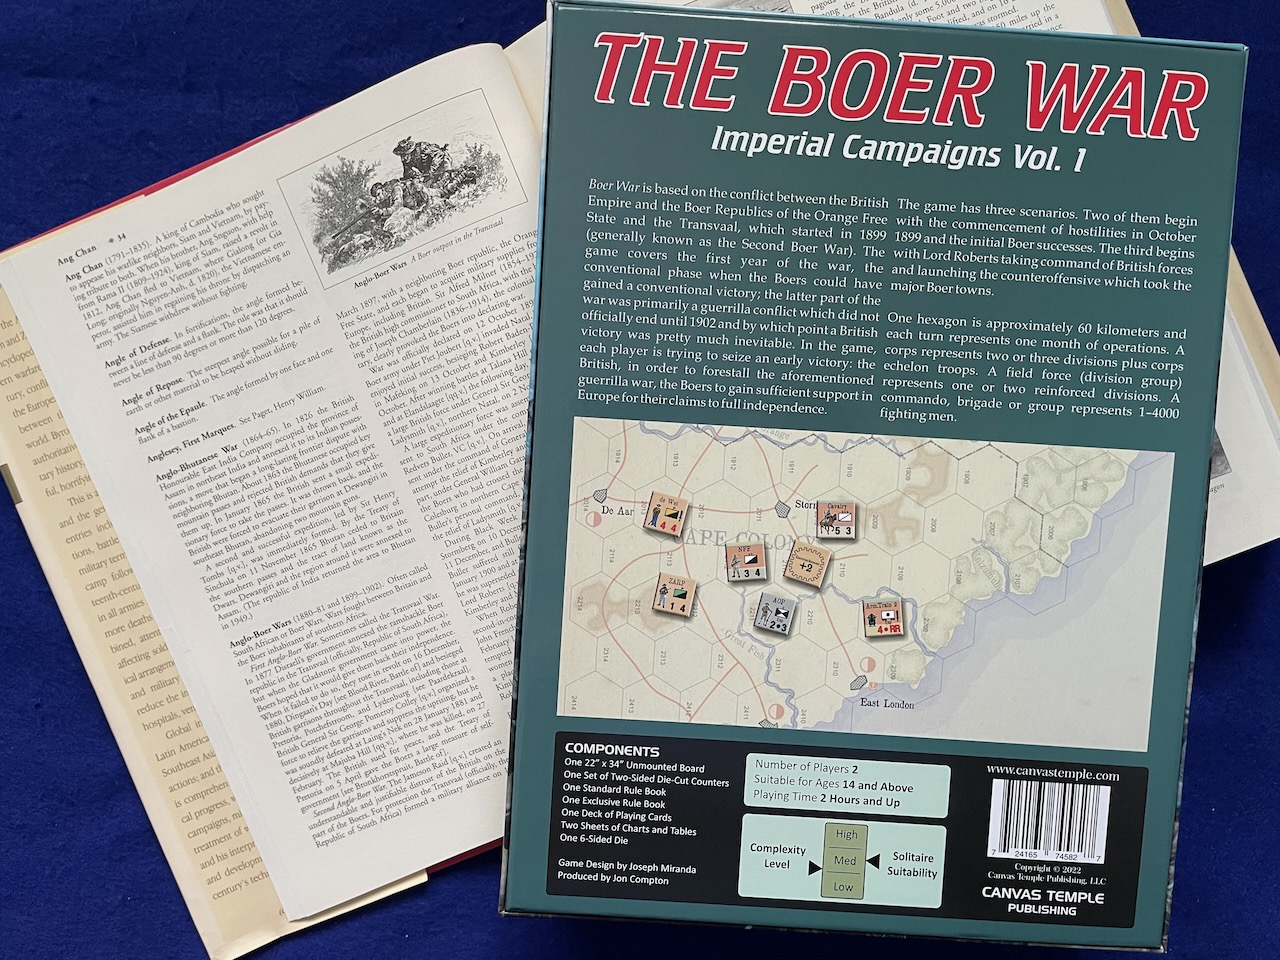
The Boer War has a simple design goal: “Imperial Campaigns is a wargame system for recreating wars and campaigns during the great age of European Empires from the 18th century to early 20th centuries, using 60-80 counters per game and a deck of cards” (Standard Rules p. 2) This first entry in the series, The Boer War is:
…based on the conflict between the British Empire and the Boer Republics of the Orange Free State and the Transvaal, which started in 1899 (generally known as the Second Boer War). The game covers the first year of the war, the conventional phase when the Boers could have gained a conventional victory; the latter part of the war was primarily a guerrilla conflict which did not officially end until 1902 and by which point a British victory was pretty much inevitable. In the game, each player is trying to seize an early victory: the British, in order to forestall the aforementioned guerrilla war, the Boers to gain sufficient support in Europe for their claims to full independence.
The Boer War, Exclusive Rules, p. 2
The Boer War is a rather straight-forward low-density hex & counter wargame with a card-driven events system laid over it. As much as control of locations is important, in The Boer War both sides must also pay attention to their Morale Points. If a players Morale Points ever equal zero (0) they lose the game. Most dramatically, Morale Points are gained/lost in combat. Additionally, Event cards can effect Morale Points, Replacement Points, or combat.
Supply also plays a role in The Boer War. The rules themselves are not very complicated; indeed, the one supply rule that probably matters the most is Standard Series rule 14.2 Irreplaceable Units where bullet 1) reads “Units eliminated in an unsupplied hex (9.0) cannot be replaced.” In a game with this low of a counter density the irreplaceable loss of any unit is tough.
Generally speaking, the game mechanisms used in The Boer War are unsurprising and uncomplicated. This makes the game quick to learn and relatively easy to teach. Combined with what should be a relatively small footprint and low counter density The Boer War makes for a good game night feature when looking for a title that can be played in an evening.

Cartography challenges
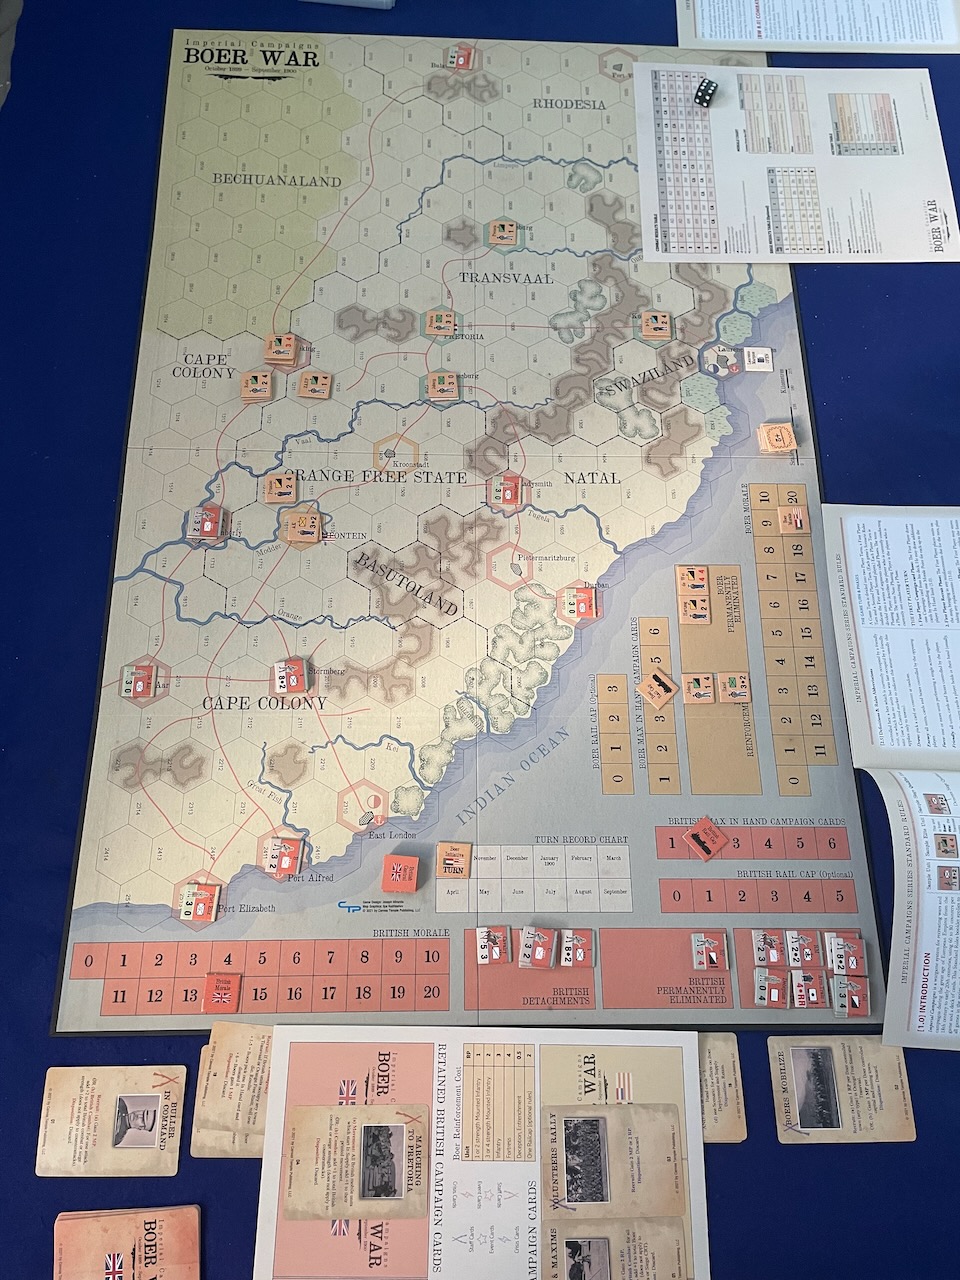
Yet, while the map in The Boer War is good sized, I find it a bit difficult to play on. My problem is simply figuring out the best way to sit at the table.
Traditionally, a two sided wargame has players sitting across the map/table from each other. Often times, player tracks or boxes or the like—the side board elements if you will—are arranged on the same side of the map as the using player. The map for The Boer War, however, is somewhat non-traditional.
My first map challenge comes from the board orientation. The map area is long and skinny, which means the map runs long-ways on the board. A “north up” orientation is used for the title logo and location names. This shouldn’t make a difference as a board with this orientation usually has players sitting facing east-west across the board from each other and both have to turn their heads to read the map text.
The hexes in The Boer War, however, run east-west (short-ways on the map) with “up” for the numbers being the east side of the map. In order to read the hex numbers you best be sitting on the west side of the map. If players are sitting east-west the hex numbers are upside down to that player. A small challenge, but a challenge nonetheless.
Next, the boxes and tracks for the Boer player are oriented to be viewed with the player sitting on the east side of the map. The British boxes and tracks, however, are at the south end of the map and oriented for a north-facing player seemingly sitting next to—not across from—the Boer player.
Confused? Let’s see if this helps:
- To best view the game logo, city names, and British tracks and boxes you must sit on the short south end of the map.
- The Boer player tracks and boxes are best viewed sitting on the long east side of the map.
- To properly read the hex numbers you best be sitting on the long west side of the map.
To help see what I mean, I drew a simple graphic below what the seating arrangement for The Boer War based on player track orientations might look like on a 3’x3′ card table.
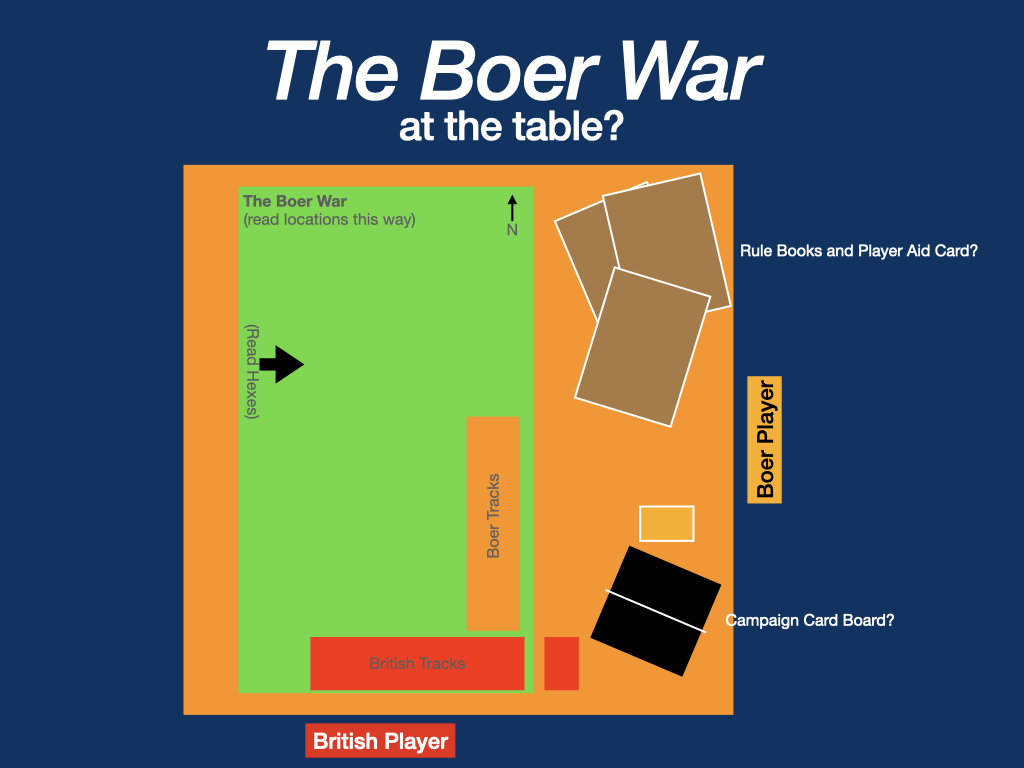
The Ludology Podcast episode #238 talked about game complexity. In particular, I like their discussion on the “Six Zones” of play: 1) Dominant Hand, 2) Non-Dominant Hand, 3) Tableau, 4) Main Board, 5) Side Board, and 6) Rule Book. Using the above arrangement this is how the zones lay out:
- For the British player the tracks (Side Board) are near, but to get to the far end to the Main Board is a long reach (must stand up?); the Campaign card board (Tableau?) is to the side (Dominant Hand if right-handed) and to get to the Player Aid or rule books requires crossing over the Boer player’s area.
- For the Boer player, the Side Board is closer than the Main Board (reversed like the British player) meaning it will take a longer reach to get to the Main Board; again, the Campaign card board (Tableau) is to the Non-Dominant Hand side (assuming right-handed) and all hex numbers are upside down and location names sideways.
I can’t really figure out why, but this arrangement just bothers me. What I see feel is that The Boer War has three different board orientations that makes play challenging in what otherwise should be a low-complexity wargame.
Right rules
The rules for The Boer War come in two books. The Imperial Campaigns Series Standard Rules is a glossy 16-page saddle-stapled rule book with the basic rules for the game series. Likewise, the Exclusive Rules of Play is another 16-page glossy saddle -stapled book. If you are an “Old Hand” type of Grognard who thinks you know all about how Joseph Miranda and Decision Games in Strategy & Tactics wrote rules, you might be tempted to give these rules just a quick skim.
THAT. WOULD. BE. A. MISTAKE.
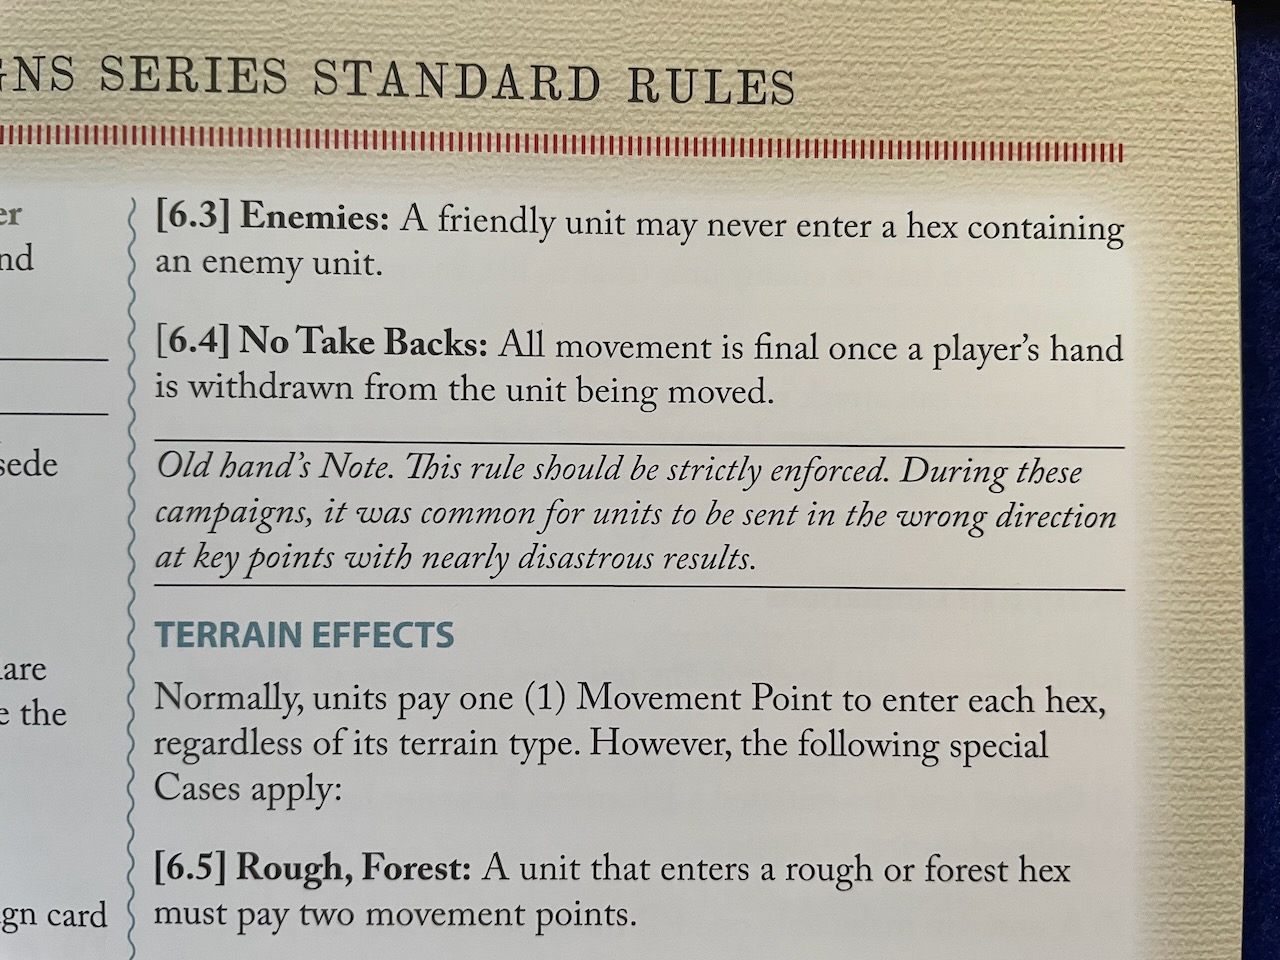
Whether we want to admit it or nor, each wargame is unique and no matter how much one thinks they know the rules it is always, always better to completely read the rule book. The rule books in The Boer War make excellent use of an “Old Hands Note”…or is it “Old hand’s Note?” [Oh, for a good proofreader!] For example, rule 6.4 No Take Backs states “All movement is final once a player’s hand is withdrawn from the unit being moved.” The “Old hand’s Note” that follows reads “This rule should be strictly enforced. During these campaigns, it was common for units to be sent in the wrong direction at key points with nearly disastrous results.” I chuckled at this “game justification” that specifically addresses one of the most endearing arguments of wargame etiquette.
As I don’t have the original S&T Boer War, I can only hope that the rules were updated to reflect all the errata and further development. Alas, there are small hints that this might not be the case. For example, on page 2 of the Exclusive Rules under game equipment, the game map is listed as 11″x 17″ and not the 22″x34″ mounted map in the game box. I hope this was a simple oversight and not indicative of not updating rules elsewhere…but there are a few other “carry-over” edits that were not made which makes me wonder.
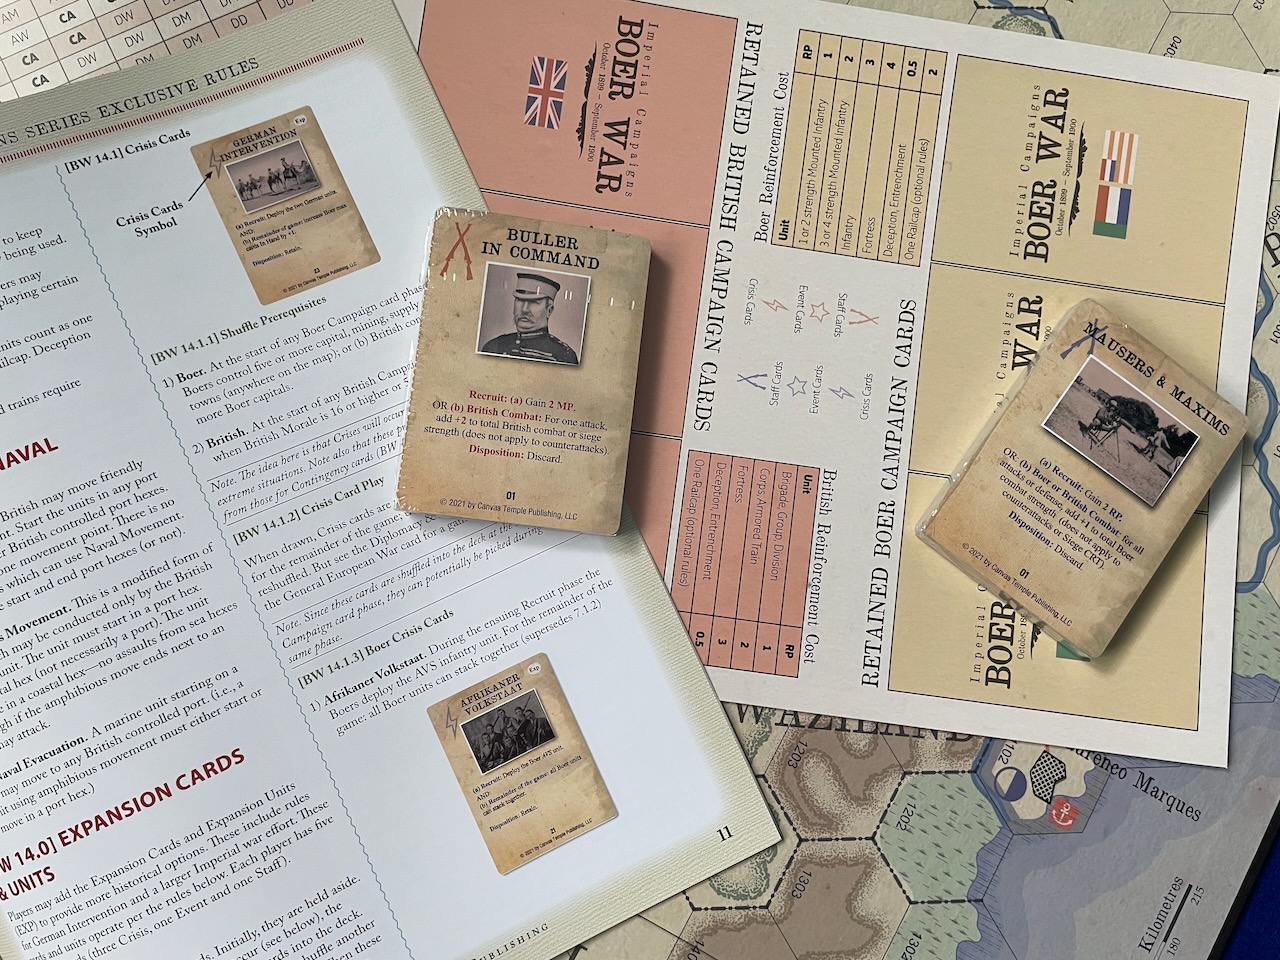
Card driven
As best I can tell, the older Boer War did not use event cards, instead opting for using political points on some sort of track. The Boer War, on the other hand, uses a card-driven game mechanism that handles much of the politics during the game as well as reinforcements/replacements. I like this update, but again sense a bit on incompleteness in the design. For example, scenario rules designate an In Hand limit to the number of cards. In scenario 1, the In Hand card size is “British=2” and “Boer=4.” There is a track on the board for each player to mark their In Hand Limit—but no marker provided on the counter mix. Further, the Campaign cards board (at least I think that’s what its called as it is not listed in the Game Equipment sections of either rule book) has only three card slots. If you are playing a scenario with an In Hand limit of four cards one is going to be hanging off the edges!
Boring in on The Boer War
With the above “complaints,” I cannot blame you if you think I dislike The Boer War. Truthfully, my feelings are mixed. I like the game, but am a bit disappointed in the package. Not the size of the package, mind you, but how it lays out on the table. The game isn’t broken, it just seems harder for me to use during play than I feel it should. I have nothing against sitting next to my fellow player, even when adversaries, but the layout brings complexity to what is otherwise a very low complexity game.
Late addendum – I reset the board for a second try using the above seating arrangement on a 3’x5′ table and it actually wasn’t so bad. I placed the board in the middle spanning the 3″ width with the Boer player sitting on the short east side and the British player sitting on the south. The campaign board stayed in the ‘southeast’ and the rule books and player aids moved to the ‘east side’ of the map board. Most importantly, in this configuration the British player did not have to reach across the Boer player area. That simple change seemed to make a world of difference. The problem is, given usual seating arrangements, it won’t work at many game conventions (or maybe even dining room tables).
Feature image courtesy RMN
RockyMountainNavy.com © 2007-2023 by Ian B is licensed under CC BY-SA 4.0 ![]()

2 thoughts on “Wargame SITREP 230328 N3 Ops – Refreshed campaigning in The Boer War: Imperial Campaigns Vol. 1 (Joseph Miranda, Canvas Temple Publishing, 2023)”