
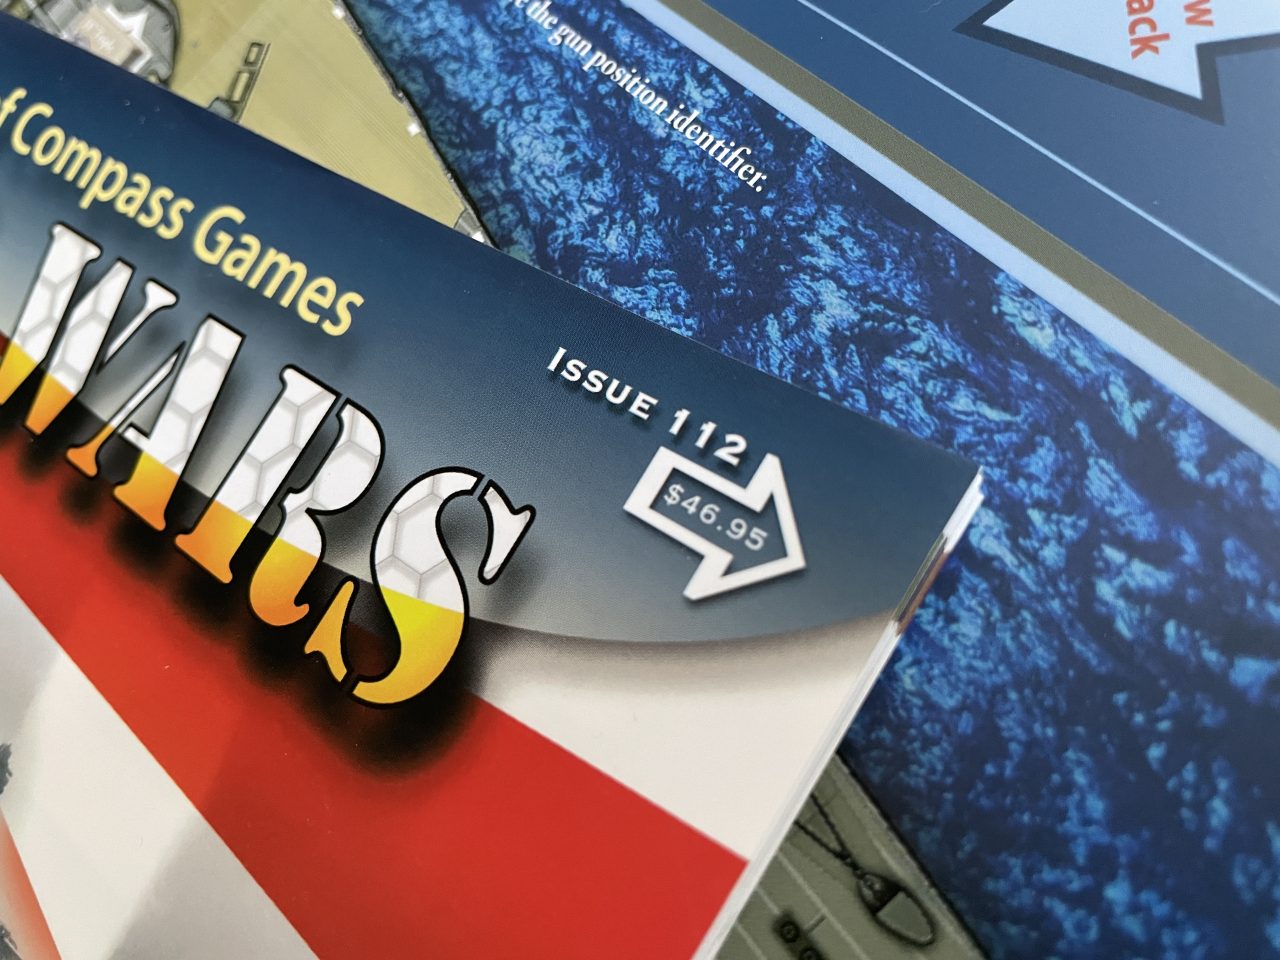
Sinking Yamato – The Final Cruise of the Super-Battleship: April 7, 1945 (A Solitaire Naval Combat Game) by Gregory Smith is the feature wargame in Issue Nr. 112 of Paper Wars: The Journal of Compass Games published in 2026. This wargame places the solo player in the role of ship’s captain of the super-battleship Yamato as it sails towards Okinawa in April 1945. The player of Sinking Yamato knows, like their historical counterparts, that this is a suicide mission and they cannot win. Sinking Yamato recognizes that reality and instead quantifies the sacrifice by measuring how long one survives. Surviving Sinking Yamato, alas, is not only a matter of surviving to the last wave but also surviving a rulebook that is not well-written.
Super-Battleship in a magazine
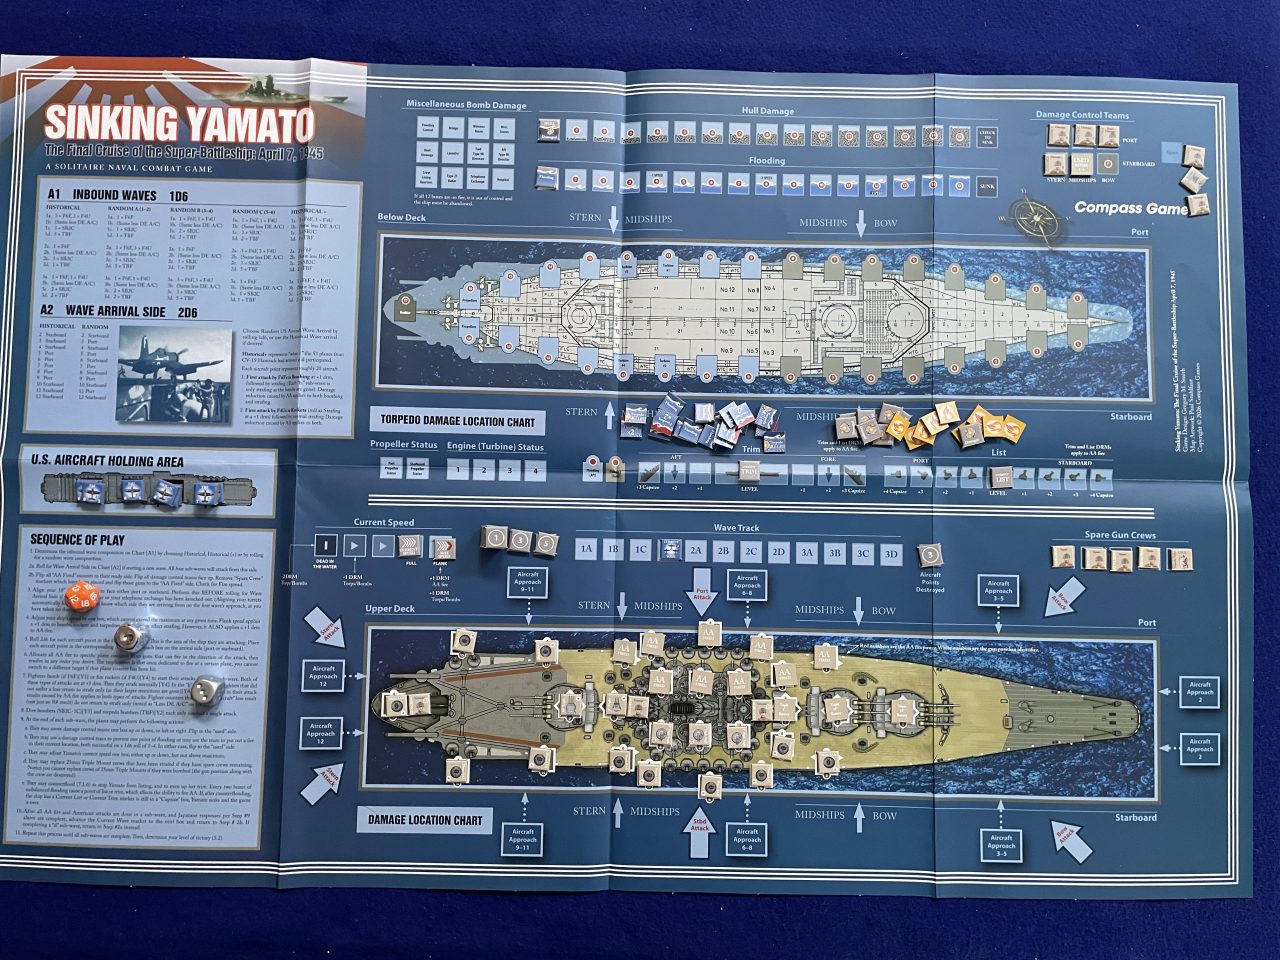
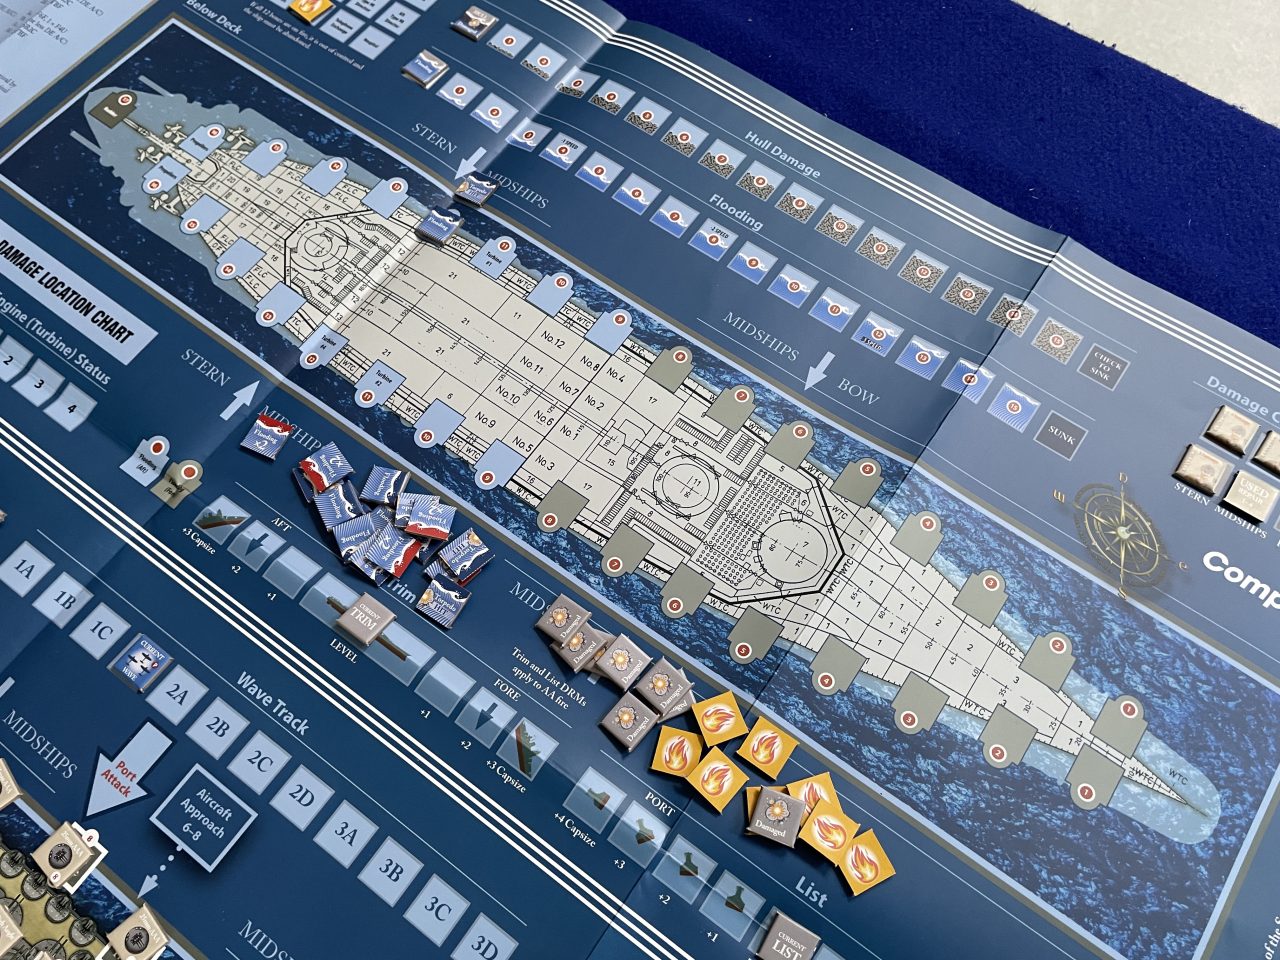
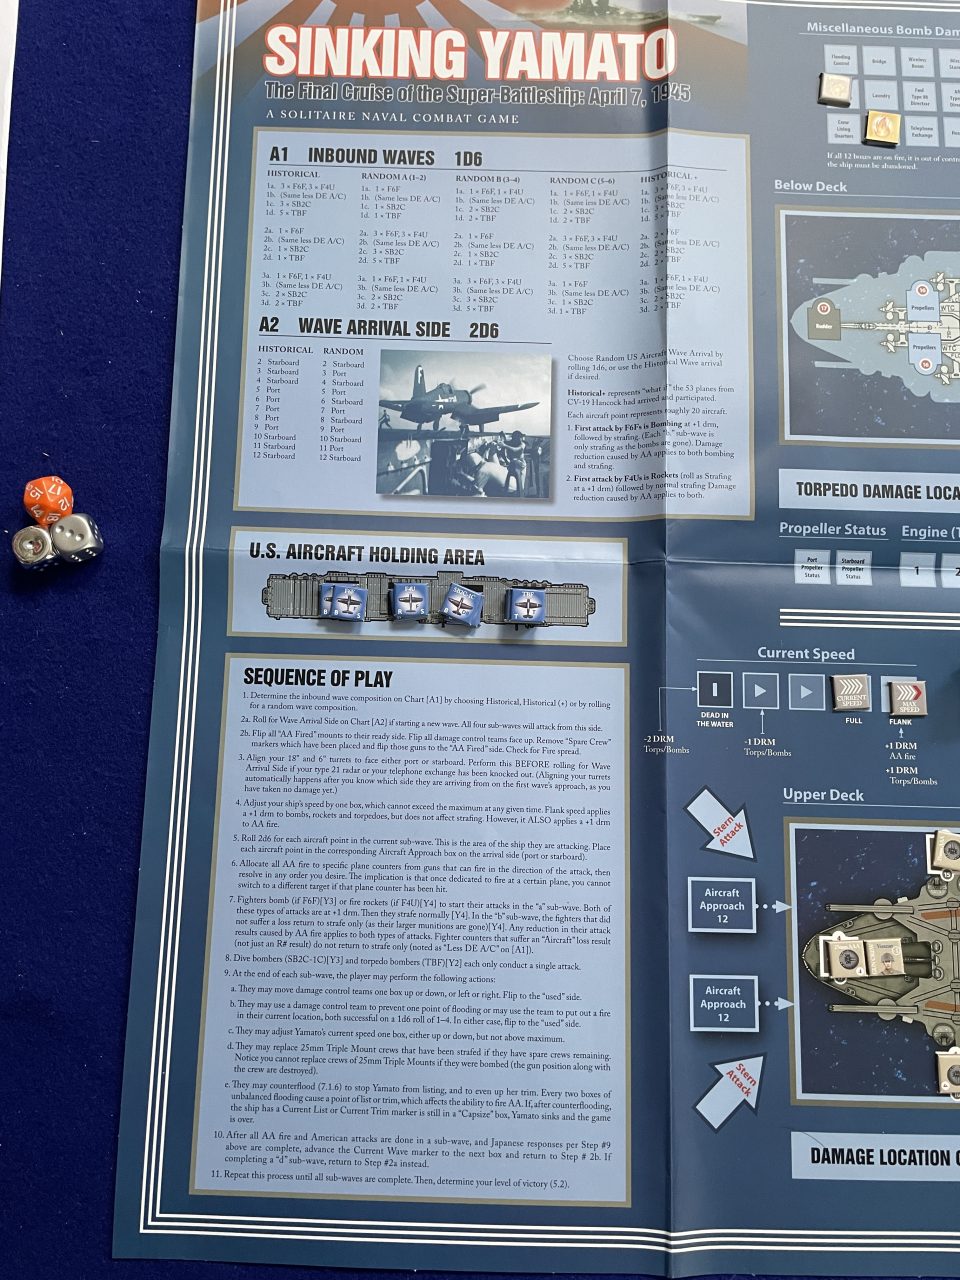
Sinking Yamato features an generously-sized 34″ x 22″ game mat with two ship’s plates of Yamato; one plate for damage control and a second plate for the anti-aircraft guns. Both plates are surrounded with various boxes or tracks for tracking damage or noting the approach of striking aircraft. Two tables are also present: one table for the composition and approaching side of the inbound waves of US Navy aircraft and a second table for the—rather comprehensive—Sequence of Play. A double-sided Player Aid card has the Combat Charts needed for play. A half-sheet of 9/16″ counters is included. The player will need a single d20 and a pair of d6 for play.
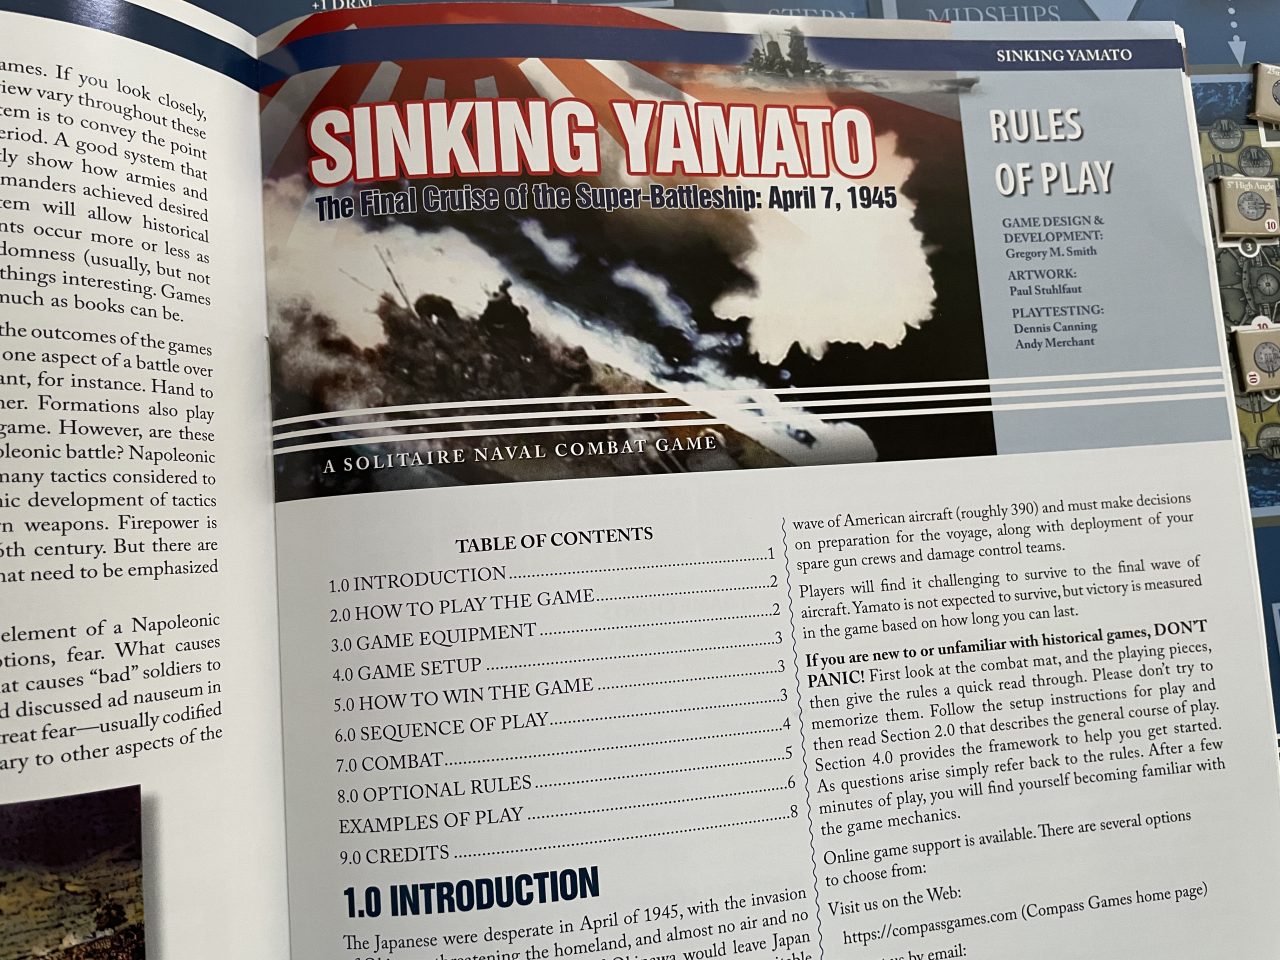
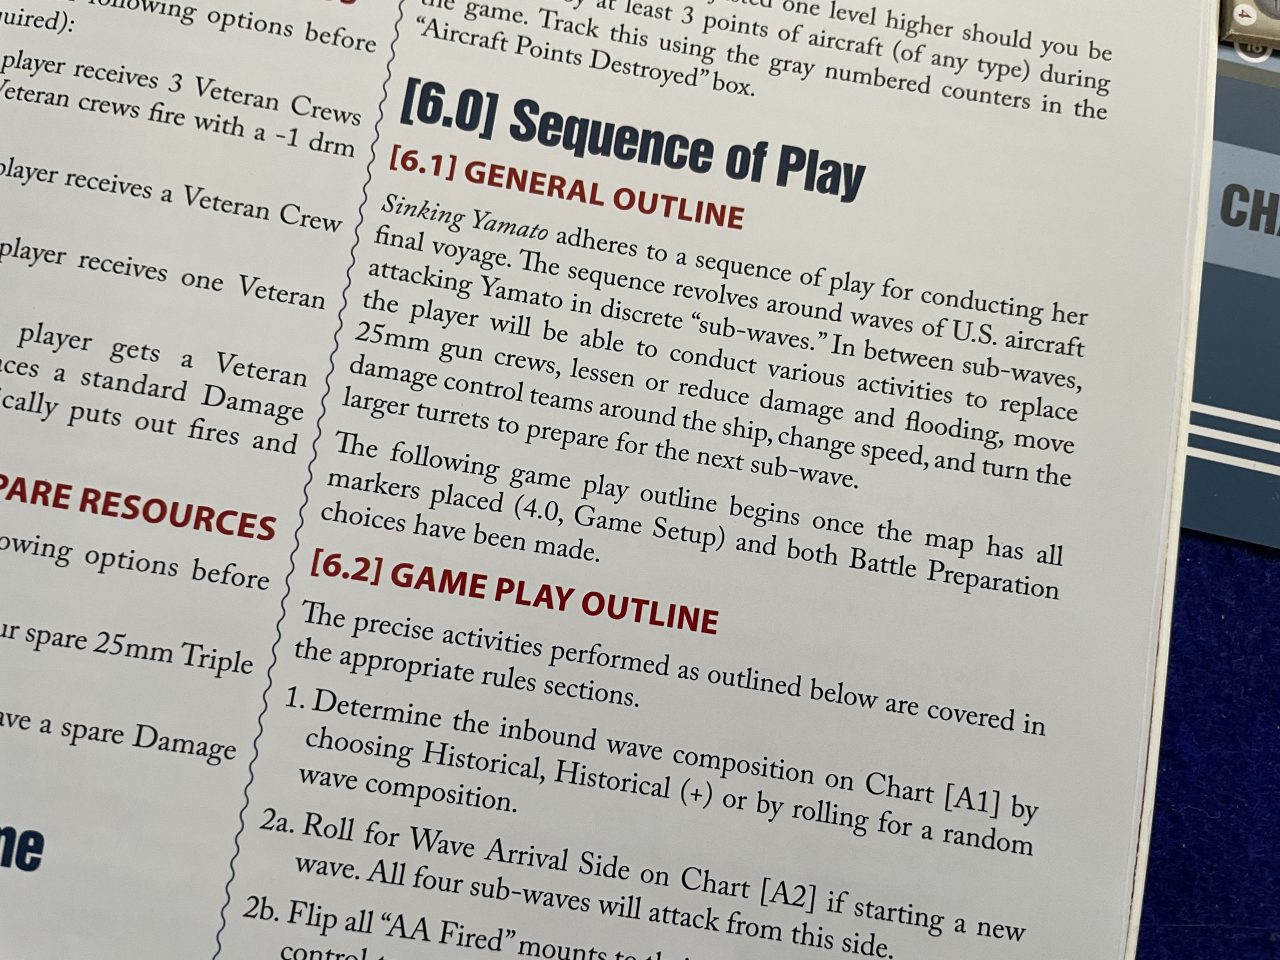
The rulebook for Sinking Yamato is a mere eight-page insert in the middle of Paper Wars Nr. 112. Technically, the rules are presented using just over five double-column pages, the balance are an Example of Play and the Sequence of Play (again). I say “again” because the rules are written using the Sequence of Play (SoP) as its framework. By the time one starts play you will have looked over the SoP at least three times; once when reading rules section 6.0 Sequence of Play, a second time when reviewing the last page of the rules, and a third time when using the Sequence of Play on the game mat.
Yamato underway
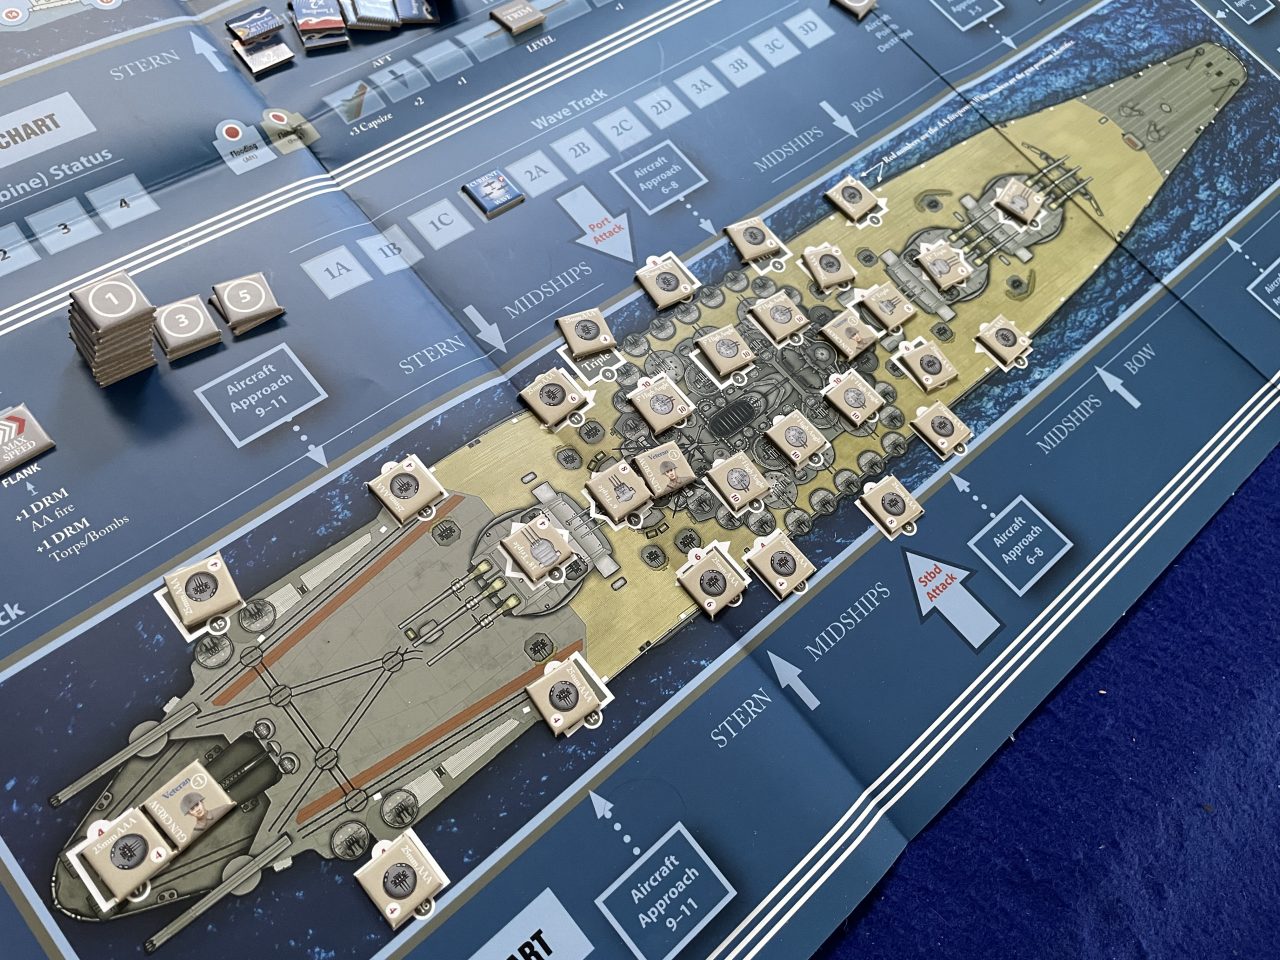
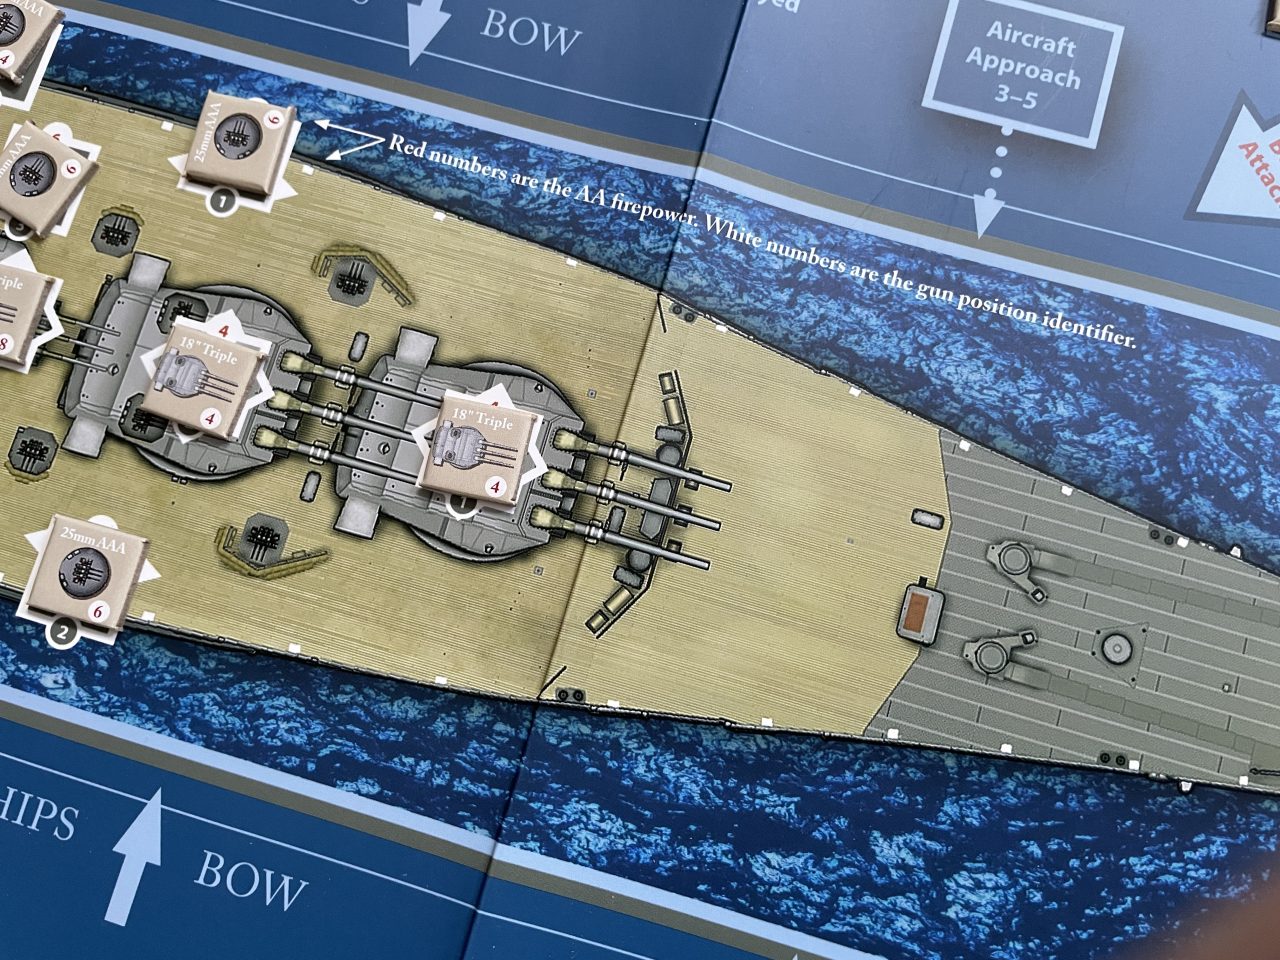
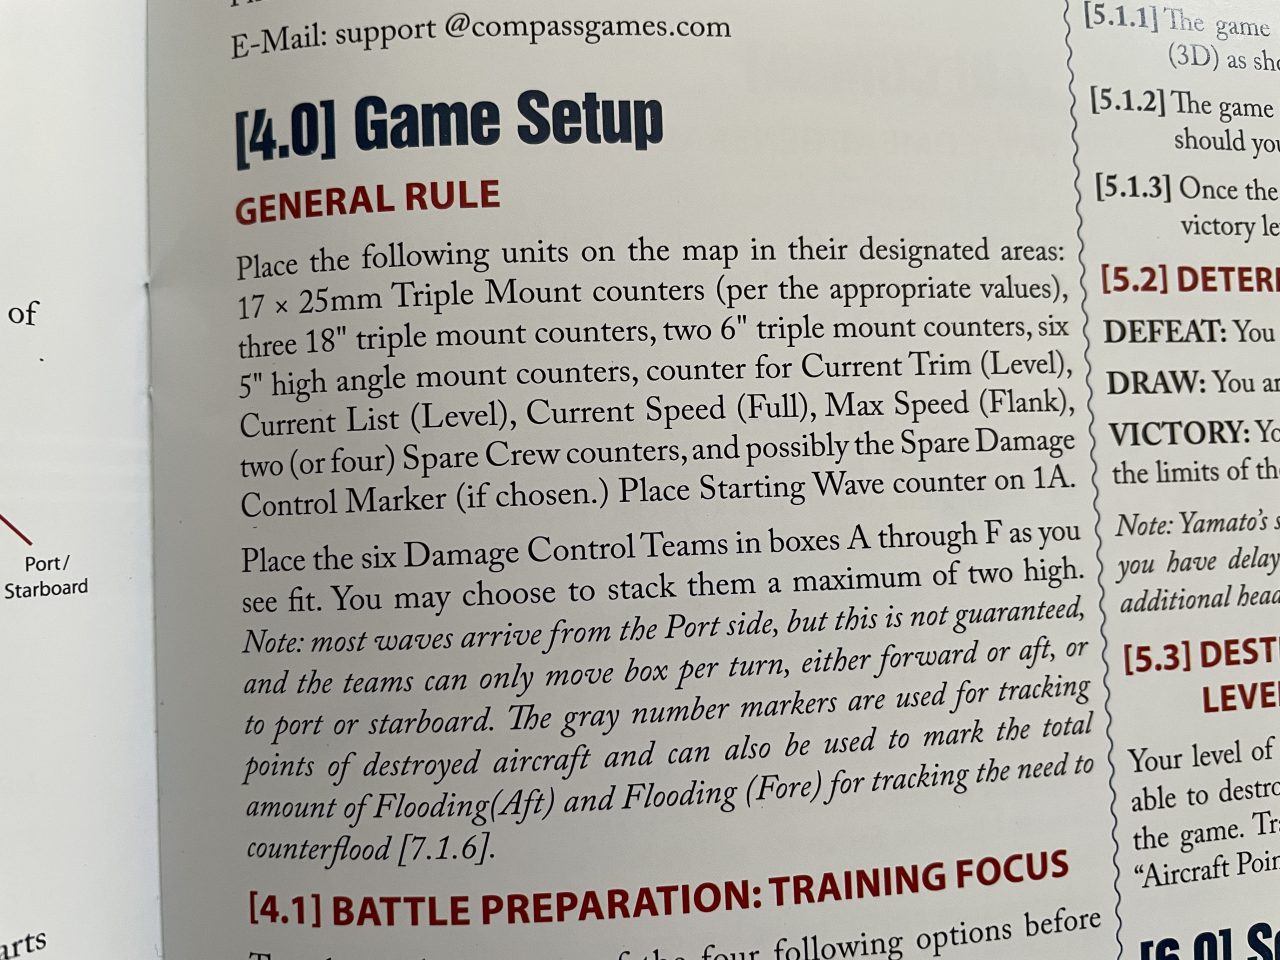
One might be tempted to play Sinking Yamato without reading the rulebook as the Sequence of Play is really that comprehensive. Comprehensive, but not complete. There are some parts you need the rulebook for but be prepared for a bit of a learning struggle because the rules are not clearly written. For example, in rule 3.3 How To Read The Markers the explanation of the Japanese Gun turrets and mounts only shows a small arrow and text for “aimed.” The rules does not explain the counter is double-sided with a “Ready” (turret showing) or back “AA Fired” side nor does it explain what the small red numbers inside the white circle means. This makes setup a bit confusing as the 25mm Triple Mount counters are placed, “per the appropriate values” (see 4.0 Game Setup – General Rule) and one has to intuit that the small red numbers in the white circles are the mentioned values.1 Once you read the rules you also discover that the aircraft markers are “aimed” based on their placement on the anti-aircraft display (see 7.12 AA Targeting).
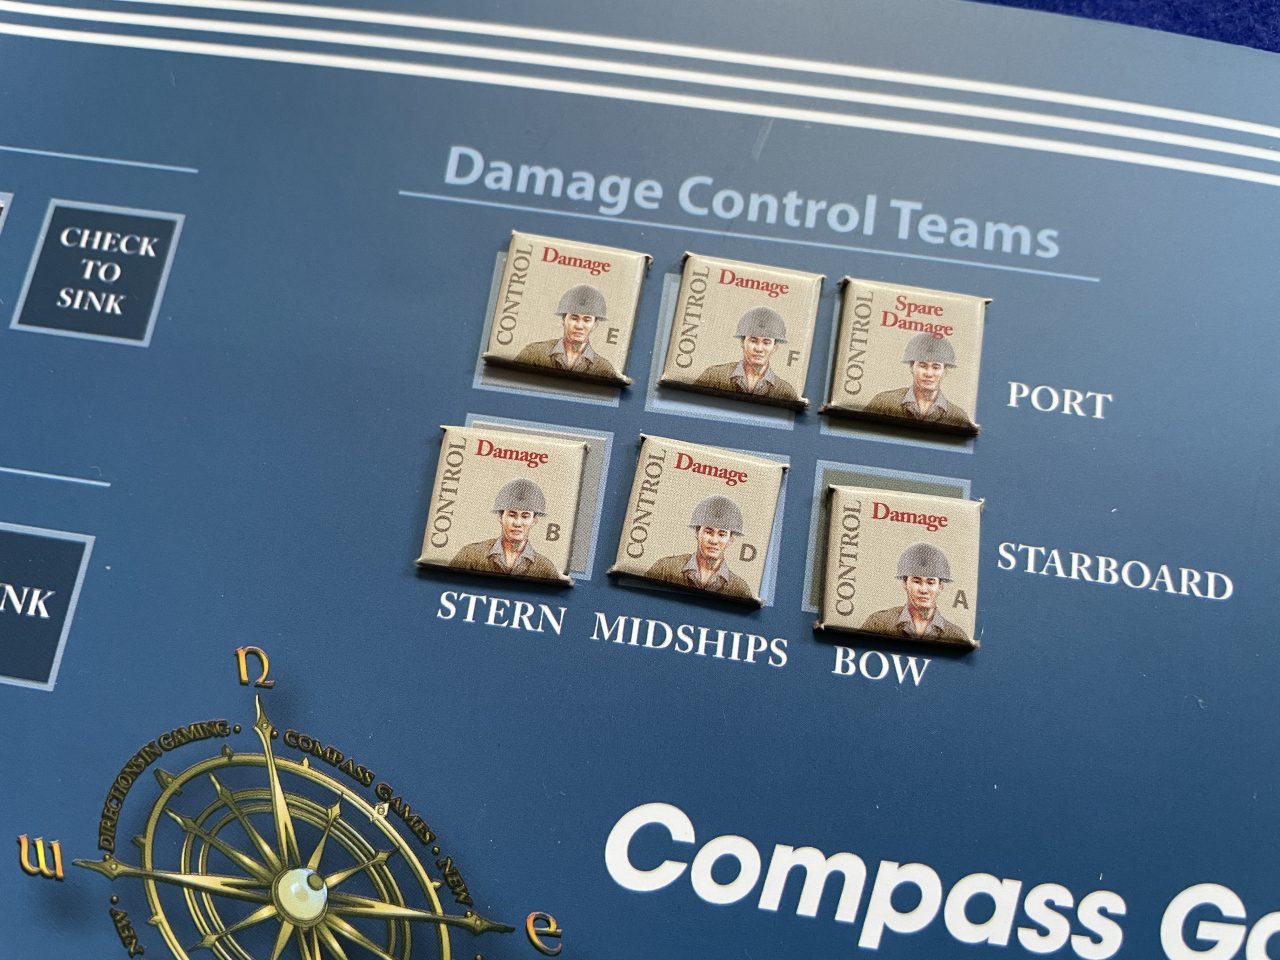
Similar challenges come from setting up 25mm Gun Crews and Damage Control Teams in Sinking Yamato. In 4.0 Game Setup you are directed to place six Damage Control Teams but with eight to chose from which six? Later, in 4.0 Game Setup there are options for extra crew (see 4.1 Battle Preparations: Training Focus and 4.2 Battle Preparations: Spare Resources for extra Gun Crews and Damage Control Teams) but at this point the player has not been told where to set up Gun Crews (that answer is eventually found in the rules for Combat under 7.1.9 Replacing 25mm Crews with Spares).
Considering the rules of Sinking Yamato as a whole, it appears to me that they were written by somebody very familiar with the game components that likely assumed details and clarifications would be taken care of later…but never were. For a wargame that is very procedural (as too many solitaire wargame are wont to be) the lack of organization and need to “intuit” rules is highly discouraging to first-time play.
“…not even a kamikaze mission…”
In the final volume of his Pacific War Trilogy, Twilight of the Gods2, author Ian W. Toll writes of Yamato’s final sortie:
The officers and crew of Yamato and her nine escorts held no illusions. Their mission was a naval banzai charge, a futile suicide rush that served no real tactical purpose. Without air cover, they would be left to fight off waves of American planes with their anti-aircraft guns alone. Just as in the the earlier case of Sho, the Japanese “victory” plan for the Battle of Leyte Gulf, the fleet was being asked to immolate itself for the abstract considerations of honor. Unlike the earlier battle, however, there was not the slightest hope for surprising the U.S. fleet. One senior officer remarked that it was “not even a kamikaze mission, for that implies the chance of chalking up a worthy target.”
Toll, p. 582
The US Navy had been tracking Yamato and it’s escort for over a week and was not surprised when it put to sea nor deceived as the group of ships seemingly shaped a course for Korea. Though a surface force of battleships was sent to intercept, the aircraft of Admiral Mitscher’s Task Force 58 were only 238 nautical miles—less than 90 minutes flight time—away. As Toll writes, “Beginning at 10:18 a.m., three carrier task groups launched an armada of 180 fighters, 75 dive-bombers, and 131 torpedo planes” (Toll, p. 582). The story continues:
The first wave of incoming carrier planes showed up on the Yamato’s radar scopes at 12:20 p.m. The Yamato’s navigator shouted: “Over 100 hostile planes headed for us!” An alert was flashed to the other ships in the task force. Ten minutes later, lookouts sighted the first clusters of black specks, high above and beyond the range of even the Yamato’s mammoth 460mm [18-inch] antiaircraft guns.
The Americans took their time, circling counterclockwise over the task force like buzzards over carrion, waiting for the trailing squadrons to fall into formation. Visibility from altitude was poor. Peering down through a layer of broken overcast between 3,000 and 5,000 feet, Ensign Harry D. Jones—an Avenger [TBF] pilot with the Hornet’s Torpedo Squadron Seventeen—could not see the enemy fleet at all. Then, through a break in the clouds, he glimpsed the Yamato. Jones thought that the superbattleship looked like “the Empire State Building plowing through the water. It was really big.”
Toll, p. 584
This is where the story in Sinking Yamato begins…
Sacrifice quantified
As the ad copy on the Compass Games website relates. “Sinking Yamato is a low-complexity, solitaire, tactical-level (single ship versus aircraft formations) game, with three waves of incoming aircraft broken down into four sub-waves each, with each aircraft marker representing roughly 20 attacking aircraft.” From rule 5.2 Determining Victory one discovers that in Sinking Yamato victory comes with three levels:
- “DEFEAT: You are sunk on sub-wave 3B or sooner.
- DRAW: You are sunk on sub-wave 3C or 3D.
- VICTORY: You are not sunk by the end of sub-wave 3D. (within the limits of the game).” (see 5.2 Determining Victory)
Rule 5.2 also makes the following observation on the definition of “victory: “Note: Yamato’s sinking is a foregone conclusion, but this merely means you have delayed things long enough to cause the Americans some additional headaches.”
While there is no American player to give the solo Japanese player headaches in Sinking Yamato, the rules deliver the headaches for them. Using the 11-step Sequence of Play as a reference here is a selection of my rules interpretation challenges the first time through the game:
- “1. Determine inbound wave composition on Chart [A1] by choosing Historical, Historical (+) or by rolling for a random wave composition.” While the Historical wave composition is the default, according to the optional rules the Random A, B, C is uses in the multiplayer variant (8.1 Multiplayer) and the Historical+ is the only other “official” solo-play option (8.2 Historical (+) Wave Arrival).
- “2a. Roll for Wave Arrival Side on Chart [A2 if starting a new wave. All four sub-waves will attack from this side.” To help you remember which side the wave is coming from a Current Wave marker is provided with a red P for Port or green S for Starboard. The P/S appear on the same side of the aircraft images; apparently it was too hard to change the layout for the P/S symbol to be on the P/S side to match the approach side.
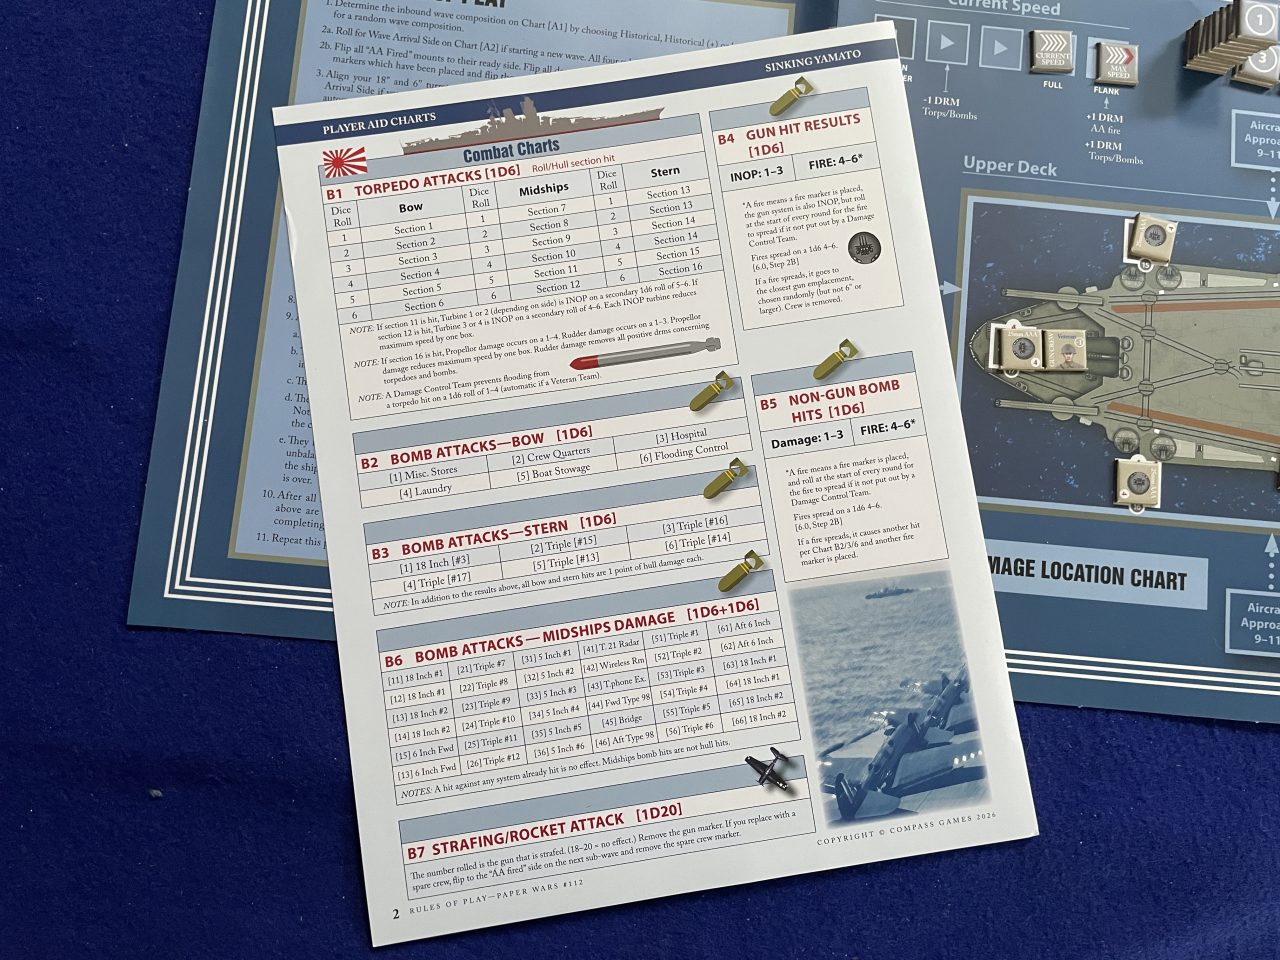
- “2b. … . Check for Fire spread.” To check for Fire Spread requires following the text on either Chart B4 Gun Hit Results or Chart B5 Non-Gun Bomb Hits which is not referenced anywhere in the rules.
- “3. Align your 18″ and 6″ turrets to face either port or starboard. Perform this BEFORE rolling for Wave Arrival Side [Step 2a] if your Type 21 radar or your telephone exchange has been knocked out.” It would be nice to see this rule show up earlier and not as a later, “oh, by the way.” And how do you align turrets? I understand you can face them port/starboard (see text in 7.1.2 AA Targeting) but why does the 18″ and 6″ guns have a star-shaped box? So they can face at an angle? What about the 25mm Triple Mounts in positions 1 and 2 (bow) or 11 and 12 (stern) that have arrows from their positions pointing both fore and aft? Oh, now I see the small label near Mount 1 explaining the red number in the white circle!
- “4. Adjust your ship’s speed by one box, which cannot exceed the maximum at any given time.” To discover how Yamato’s maximum speed is reduced one must read the Notes on Chart B1 Torpedo Attacks and cross-check with rule 7.1.5 Torpedo Damage while understanding that “Turbine” in the chart notes is the same as “Engine” in the rules.
- “6. Allocate all AA fire to specific plane counters from guns that can fire in the direction of attack, then resolve in any order you desire.” As simple as that step sounds, finding the explanation of the AA results is not that simple. Rule 7.1.1 Antiaircraft Fire explains what the R1/R2/R3 results mean.
- “7. Fighters bomb…or fire rockets… . They then strafe normally… .” That is a not-so-clear way of saying that in “a” waves fighters get a second strafing attack regardless of their losses but in “b” waves only fighters that have no losses return to strafe. Again, another rule that needs to be cross-checked, in this case 7.1.3 Strafing Damage where the player rolls a d20 to determine the 25mm Triple Mount affected. Except the numbered mounts only go up to 17. In the Example of Play on rules page 6 there is a passing comment made that, “(with only 17 mounts, rolls of 18, 19, and 20 are always ignored).” Nice to share that in the example of play and not in a rule.
- “8. Dive bombers…and torpedo bombers…conduct a single attack.” This one sentence step actually has multiple sub-steps:
- The number of hits is determined by referencing Chart Y2 Torpedo Attack or Chart Y3 Dive Bomb Attack.
- For each torpedo hit refer to Chart B1 Torpedo Attacks (in conjunction with rule 7.1.5 Torpedo Damage).
- Pay particular attention to which torpedo hits require a secondary roll.
- Although not called out in a separate rule (like 7.1.6 Counterflooding), this is where the rules for Flooding are buried.
- For each bomb hit refer to Chart B2/B3/B6 for Bomb Attacks dependent on which section is targeted (bow, stern, or midships, respectively) read in conjunction with rule 7.1.4 Bomb Damage.
- If the Bomb hit is to a gun mount roll again on Chart B4 Gun Hit Results.
- If the Bomb hit is something other than a gun roll on Chart B5 Non-Gun Bomb Hits.
- Note also that per rule 7.1.7 Hull Damage that, “When a torpedo or bomb hits, it causes a point of Hull Damage.”
- Make sure to read rule 7.1.7 all the way to the end to find the exception: “Bomb hits to midships are not Hull Damage, only bomb hits to Bow or Stern.”
- “9. At the end of each sub-wave, the player may perform the following actions:”
- “9a. They may move damage control teams…” is not mentioned anywhere else in the rules.
- “9b. They may use a damage control team to prevent one point of flooding…” is mentioned in rule 7.1.5 Torpedo Damage but lacks the die roll requirement which is found in a Note to chart B1 Torpedo Attacks.
- “9d. They may replace 25mm Triple Mount crews..” should include a cross-reference to rule 7.1.9 Replacing 25mm Crews with Spares.
Amongst the rules in Sinking Yamato that are not on the Sequence of Play that I also find confusing is rule 7.1.11 Specific Damage Effects. This rule talks about the impact from damage on certain boxes but many are unknown. While the rule gives the impact of damage to the Flooding Control Box and the Telephone Exchange or Type 21 Radar, the impact of hits to the other nine locations (Bridge, Wireless Room, Misc. Stores, Boat Stowage, Laundry, Forward Type 98 Director, Aft Type 98 Director, Crew Living Quarters, and Hospital) are undefined. I can think of a few game effects the loss of some of those locations might have but why name them if there is no game effect in the rules as written?

Worth the sacrifice
If you are still reading this review you likely expect me to finally pan Sinking Yamato and “abandon ship” to use a phrase. Actually, I think Sinking Yamato is a fair game; that is, once you get through learning the rules which will take time. My problem with Sinking Yamato is that I expected a low-complexity game—which it is—but I did not expect the challenges in “putting together” the rules that, while mostly complete (with the lack of further clarification in rule 7.1.11 Specific Damage Effects being a glaring exception), need plenty of patience to wander through.
That said, if one reads Ian W. Toll’s words on the aftermath of Yamato, one almost certainly will feel their humanity driving them to get a better-than-historical result in Sinking Yamato:
The cloud that rose above Yamato was more than a thousand feet in diameter, and it ascended to 20,000 feet above sea level. The explosion was seen in Kagoshima, 125 miles away. When the cloud lifted, the Yamato was no longer there. Just 23 officers and 246 enlisted men survived; the ship had taken nearly 3,000 soules with her into the abyss.
Toll, p. 589
While I will raise a glass in toast of memories and honor of sailors lost, I nonetheless must question the monetary value—a sacrifice I am being asked to pay—of Sinking Yamato. The retail cover price of Paper Wars Nr. 112 is $46.95. The 48-page magazine includes the eight-page rules insert for Sinking Yamato along with the (very nice) game mat, half-sheet of counters, and the single two-sided Player Aid. Of the 48 pages in the magazine, aside from the cover one finds only two pages devoted to Sinking Yamato—just a bit over 6% of the content. Of the other 45 pages I personally only find (mild) interest in the two-page “Design Deep Dive: Cactus Air Force” (which I cannot find on the Compass Game website) and the two “Case Geld” after action reports (nine pages). Which is all to say that aside from the “low-complexity” and component-limited Sinking Yamato and 14 pages of Paper War Nr. 112, the other 34 pages of the magazine (~71%) are an overspend by me.
So do I recommend Sinking Yamato? Yes, I do; but I also encourage you to quantify your budget sacrifice and find the best price you can get.
- See my later comment about the game mat where the secret of the number is revealed. ↩︎
- Toll, Ian W. (2020) Twilight of the Gods: War in the Western Pacific, 1944-1945. New York: W.W. Norton & Company. ↩︎
- See “Fire Breaks Out Aboard USS Gerald R. Ford Aircraft Carrier in the Red Sea” from theaviationist.com (12 March 2026). ↩︎
Feature image courtesy RMN
The opinions and views expressed in this blog are those of the author alone and are presented in a personal capacity. They do not necessarily represent the views of U.S. Navy or any other U.S. government Department, Service, Agency, Office, or employer.
RockyMountainNavy.com © 2007-2026 by Ian B is licensed under CC BY-SA 4.0

I am still waiting for the money to get a copy of the game, but I will because I have a fascination with the Yamato class and the IJN in general. I agree that, from my reading, the rules could have been better. Now where I am extremely surprised is Toll’s massive misreading of the whole mission. It is a tad too much “military orientalism” for my testes. Yes there was an element of showing off (the surface Navy had to to something for Okinawa), and it is reported that the mission CO, Admiral Ito even questioned Admiral Toyoda Soemu’s (Combined Fleet Commander and later IJN Chief of Staff) wisdom. The line even made in the big Japanese movie on the Yamato. But saying it is was tactically useless it is a stretch. It also conveniently overlook US Navy errors and some lack of judgment on the part of Admiral Mitscher. Yes Yamato odds were low but not inexistent. The tactical purpose was to play on the USN bad habit to go against ships with airpower. Toyoda assumed (rightly as it was), that the mere presence of the Yamato and its escorts would have acted as a bait for carrier airpower. That would have made kamikaze attacks more effective draining fighter cover and disrupted air support on the island. Mitscher played in his hand. There was a suggestion from Lee to go after the Yamato with the fast battleships (that were not as useful as the older battlewagons on shore bombardment), but of course Mitscher wanted the honor to go to the naval aviation. The Yamato acted as a magnet for airpower just like she and Musashi did at San Bernardino. She sucked planes after planes and allowed a more effective Kikusui raid. On top of that the mission was so big that required a stand down before and after and while on the surface american losses were light, conventional histories never examine aircraft damage (including DBR category…). Sortie generation decreases after the Yamato sortie. Considering the situation and the resources available it was a reasonable mission.